Moving into a new home is exciting — but the air inside may not be as clean as it looks. Whether you are settling into new construction, a recently renovated space, or an older home, indoor air quality issues are common and often invisible. New paint, fresh flooring, and sealed windows can trap volatile organic compounds (VOCs) at concentrations 2 to 5 times higher than outdoor air, according to the EPA. Older homes carry their own risks: radon seeping through foundation cracks, legacy lead paint, and hidden mold behind walls.
The good news is that a simple, structured approach during your first month can identify problems early — before they affect your health. This checklist walks you through everything from moving day ventilation to establishing long-term air quality monitoring.
Key Takeaways
- 1New homes off-gas VOCs heavily for 2-8 weeks after construction or renovation — ventilate aggressively during this period and run a HEPA purifier with activated carbon
- 2Radon testing should begin in your first week and run for at least 48 hours (short-term) or 90+ days (long-term) for accurate results — 1 in 15 U.S. homes exceeds the EPA action level of 4.0 pCi/L
- 3Humidity between 30-50% prevents mold growth and reduces dust mites — monitor it from day one, especially in basements, bathrooms, and kitchens
- 4New construction and older homes have fundamentally different air quality risks: off-gassing and tight-building syndrome vs. radon, asbestos, lead paint, and aged HVAC systems
- 5Renters can significantly improve air quality without modifications using portable air purifiers, standalone monitors, and humidity management
Quick Answer
What should I do about air quality when I move into a new home?
On moving day, open every window for at least 2-4 hours to flush out accumulated VOCs and stale air, then start running a HEPA air purifier. During your first week, begin a radon test, check humidity levels in every room, and inspect for visible mold or moisture damage. By the end of month one, review radon results, establish baseline air quality readings with a monitor, and address any issues you have identified. The essential toolkit is an air quality monitor (like the Airthings View Plus), a HEPA air purifier, and a hygrometer or humidity-capable monitor.
Moving Day: Immediate Actions
Your first hours in a new home set the tone for indoor air quality. Every home — regardless of age — accumulates stale air, dust, and chemical compounds when closed up during vacancy, staging, or construction.
Open Every Window
Before you unpack a single box, open every window and exterior door for at least 2 to 4 hours. This initial flush replaces stagnant indoor air with fresh outdoor air and begins diluting any VOCs that have accumulated. If the home has been vacant for weeks or months, chemical concentrations can be surprisingly high even in older properties.
Turn on all bathroom and kitchen exhaust fans to create cross-ventilation. If the home has a whole-house fan or an HVAC system with a fresh-air intake, run it on fan-only mode to accelerate air exchange.
Run a HEPA Air Purifier
Start your air purifier on the highest setting as soon as you have power. Position it in the room where you will spend the most time — typically the bedroom or main living area. A HEPA purifier captures airborne dust, particulate matter, and allergens stirred up by moving activity, while an activated carbon filter helps absorb VOCs.
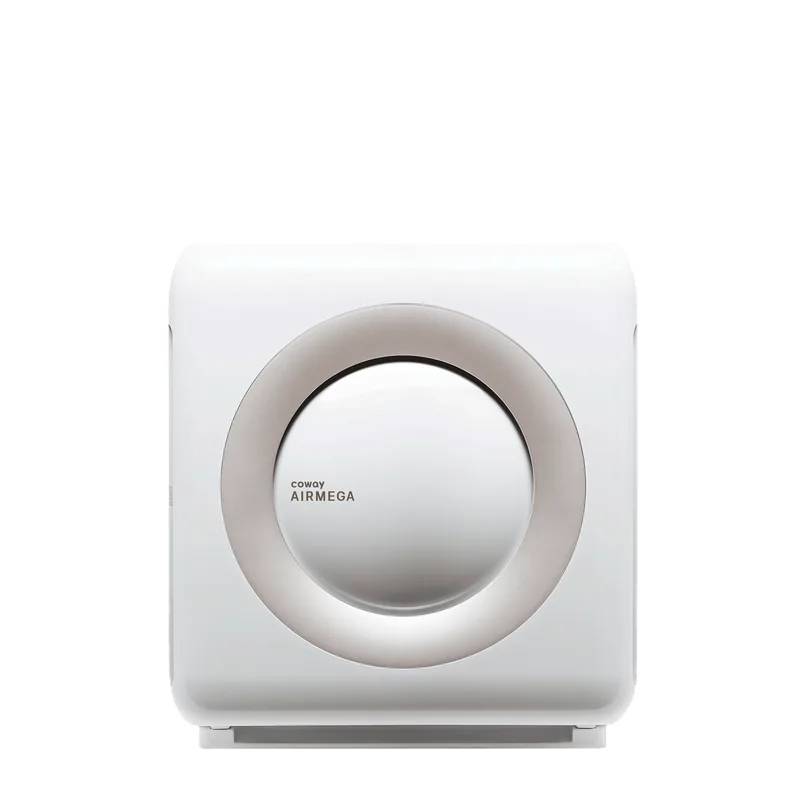
The Coway Airmega AP-1512HH is an excellent choice for this purpose. It covers up to 361 square feet, runs quietly enough for a bedroom, and its True HEPA plus carbon filtration addresses both particles and chemical vapors. At $229, it is the best value air purifier you can buy, consistently earning top ratings from thousands of customer reviews.
Check for Visible Mold and Moisture
Walk through every room and inspect for signs of water damage or mold growth:
- Ceilings and walls — Look for stains, discoloration, bubbling paint, or soft drywall
- Under sinks — Check for leaking pipes, warped cabinet floors, or musty odors
- Basements and crawl spaces — Note any standing water, efflorescence (white mineral deposits) on concrete, or visible mold
- Window sills and frames — Condensation stains indicate chronic humidity issues
- HVAC vents and returns — Dark discoloration around vents can signal mold in ductwork
If you find active mold growth covering more than 10 square feet, the EPA recommends professional remediation rather than DIY cleanup.
Change HVAC Filters
If the home has a central HVAC system, replace the filter immediately — you have no way of knowing when it was last changed. Use a MERV 11-13 rated filter for effective particle capture without restricting airflow. This is one of the simplest and most impactful things you can do on day one.
Week One: Test and Identify
Once you are settled enough to establish routines, your first week is about gathering data and identifying the specific air quality challenges in your new home.
Start a Radon Test
Radon is an invisible, odorless radioactive gas that seeps into homes through foundation cracks, and it is the second leading cause of lung cancer in the United States. The EPA estimates that 1 in 15 homes has radon levels at or above the action level of 4.0 pCi/L. Every home should be tested, regardless of construction type or geographic location.
Short-term test kits ($10-30 at hardware stores) provide results in 2-7 days and give you a useful initial reading. Place the kit in the lowest livable level of your home — usually the basement or ground floor — at least 2 feet off the ground and away from exterior walls, windows, and drafts. Keep windows and doors closed as much as possible during the test.
For the most accurate picture, plan to follow up with a long-term test (90+ days) or a continuous electronic monitor. The Airthings View Plus includes a built-in radon sensor that tracks levels continuously over time, though its readings take approximately 30 days to fully stabilize.
Monitor Humidity Levels
Humidity is one of the most important and most overlooked factors in indoor air quality. The ideal range is 30-50% relative humidity:
- Below 30% — Dry air irritates respiratory passages, worsens eczema, and causes static electricity
- Above 50% — Excess moisture promotes mold growth, dust mite reproduction, and musty odors
- Above 60% — Conditions become ideal for mold colonization and structural damage
Check humidity in every room during your first week, paying special attention to basements, bathrooms, kitchens, and laundry areas. A dedicated air quality monitor gives you continuous readings, but even an inexpensive hygrometer ($10-15) reveals room-by-room patterns.
If you find consistently dry air below 30% — common in arid climates, during winter months, or in heavily air-conditioned homes — a humidifier can bring levels into the healthy range.
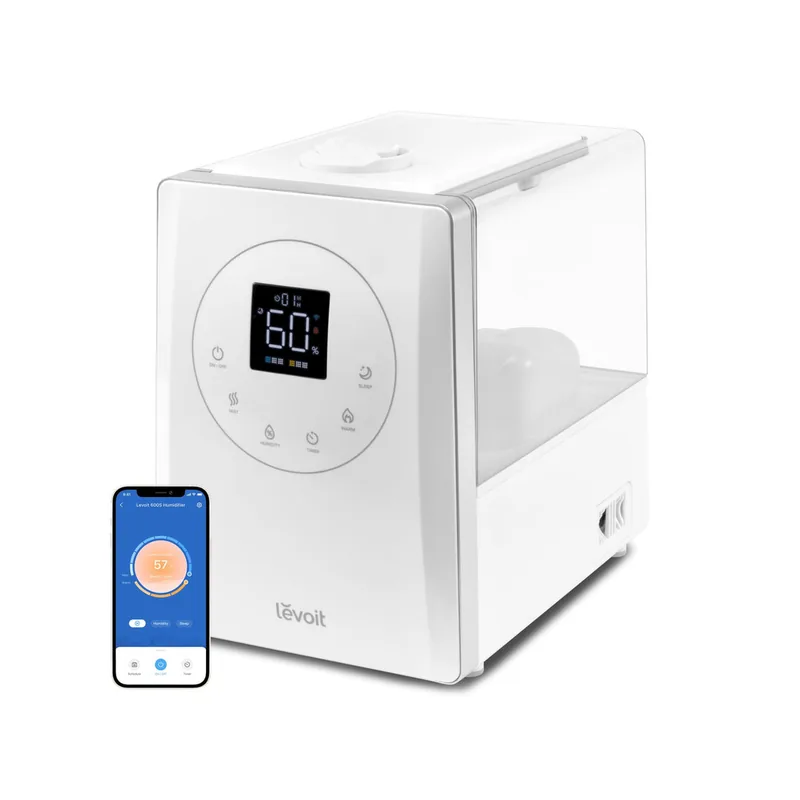
The Levoit LV600S covers up to 753 square feet and offers both warm and cool mist with smart app control, making it easy to maintain target humidity levels automatically. Customer reviews consistently praise its large tank capacity and quiet operation.
Identify VOC Sources
Volatile organic compounds are gases emitted by building materials, furniture, cleaning products, and personal care items. In a new or recently renovated home, VOC levels can be extremely high. Walk through your home and note potential sources:
- New paint — Even low-VOC formulas off-gas formaldehyde and other compounds for several weeks
- New furniture — Particleboard, plywood, and laminate release formaldehyde from adhesive resins
- New flooring — Laminate, vinyl, and engineered hardwood emit VOCs during the first weeks after installation
- New carpeting — Releases styrene, toluene, and other chemicals (the characteristic "new carpet smell")
- Cleaning products — Bleach, ammonia-based cleaners, and air fresheners add to the chemical load
The most effective strategy for VOCs is source control combined with ventilation. Continue airing out the home daily — even 15-20 minutes of open windows makes a meaningful difference. If you cannot open windows (weather, security, or noise concerns), an air purifier with activated carbon filtration helps absorb gaseous pollutants that HEPA filters alone cannot capture.
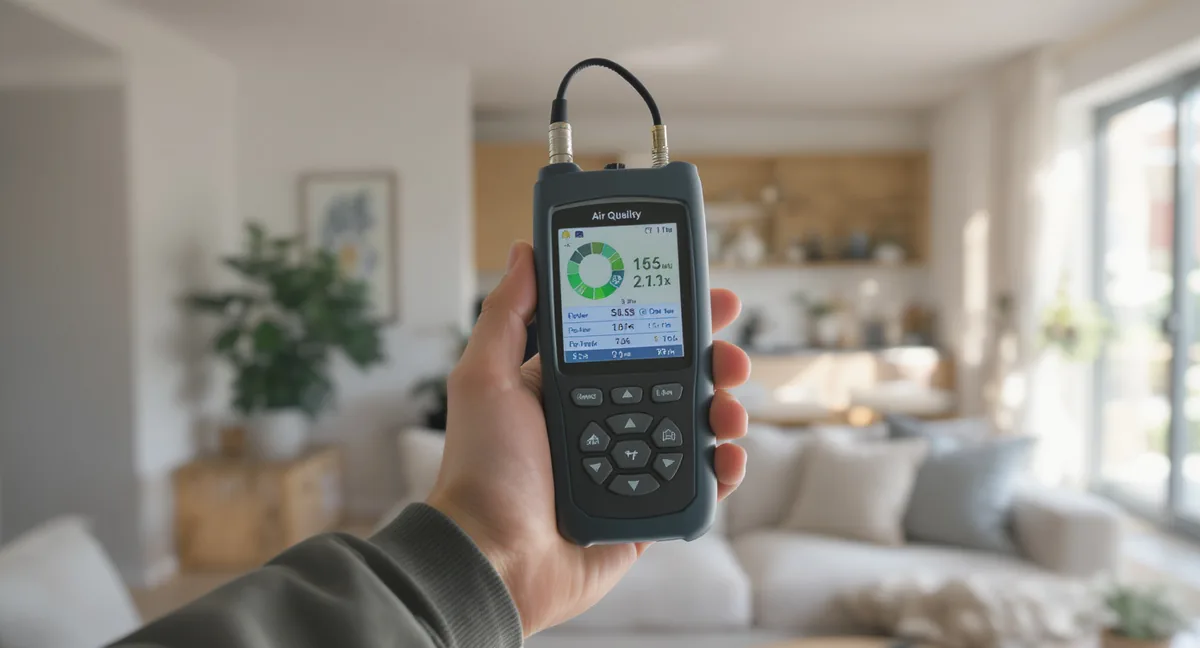
Set Up an Air Quality Monitor
An air quality monitor transforms guesswork into data. Rather than wondering whether your air is clean, you can see real-time measurements of PM2.5, CO2, VOCs, humidity, and temperature — and track how they change throughout the day and in response to your activities.
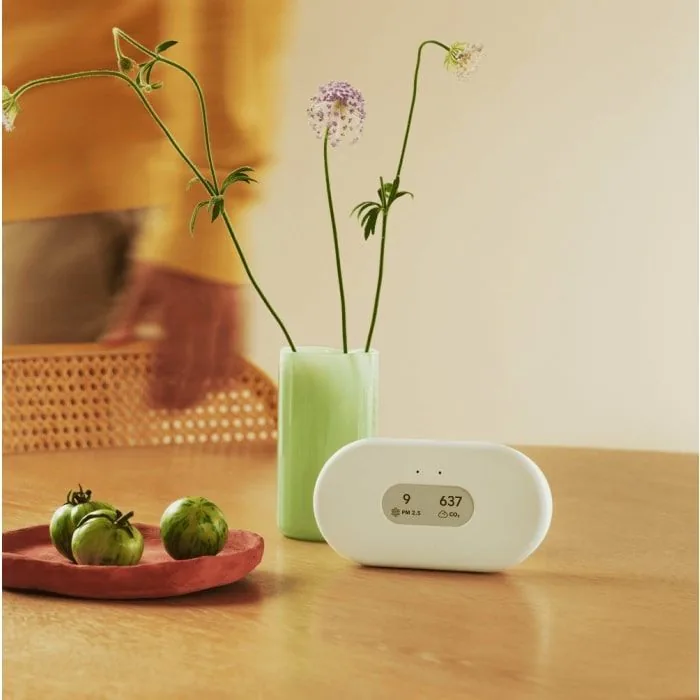
The Airthings View Plus is the most comprehensive consumer monitor available. At $329.99, it tracks radon, PM2.5, CO2, VOCs, humidity, temperature, and air pressure — all in one device. Its e-ink display shows readings at a glance, and the app provides historical trends and actionable insights. Battery life exceeds two years, so you can place it anywhere without worrying about outlets.
Month One: Establish Your Baseline
By the end of your first month, you should have enough data to understand your home's air quality patterns and make informed decisions about long-term improvements.
Review Radon Results
If you used a short-term test kit, you should have results by now. Interpret them using the EPA guidelines:
- Below 2.0 pCi/L — Low risk. No immediate action needed, but retest every 2-5 years or after major renovations
- 2.0 to 3.9 pCi/L — Moderate risk. Consider mitigation, especially if you have a basement or spend significant time on the lowest floor
- 4.0 pCi/L or above — The EPA recommends taking action. Contact a certified radon mitigation professional. A sub-slab depressurization system ($800-2,500 installed) reduces radon by 80-99%
If your short-term test showed elevated levels, follow up with a long-term test (90+ days) to confirm, as radon fluctuates seasonally and with weather conditions. If you have installed an Airthings View Plus, it will be approaching its first reliable long-term reading by this point.
Establish Baseline Air Quality Readings
After a month of continuous monitoring, review your data for patterns:
- PM2.5 spikes — Do they correlate with cooking, vacuuming, or outdoor pollution events? Persistent levels above 12 µg/m³ (WHO guideline) warrant action
- CO2 levels — Does CO2 rise above 1,000 ppm overnight in bedrooms? This indicates inadequate ventilation during sleep
- VOC trends — Are total VOC levels declining week over week as new materials off-gas? If not, you may have an ongoing source that needs identification
- Humidity patterns — Note which rooms trend too dry or too humid and at what times of day
This baseline becomes your reference point. You will know what is normal for your home and can spot anomalies quickly.
Address Identified Issues
Based on your first month of data, take targeted action:
- High PM2.5 — Run your HEPA purifier consistently, improve cooking ventilation (use range hood vented outdoors), and reduce candle or incense use
- High CO2 — Improve bedroom ventilation by cracking a window or running the HVAC fan intermittently at night
- Persistent VOCs — Increase ventilation, identify and remove the source if possible, or add activated carbon filtration
- Humidity out of range — Use a humidifier (below 30%) or dehumidifier (above 50%) to maintain the 30-50% target
Ongoing: Long-Term Monitoring
Air quality is not static. It changes with seasons, weather, home improvements, and lifestyle shifts. A few simple habits keep your indoor environment healthy year-round.
Seasonal Checkpoints
- Spring — Pollen infiltration increases PM2.5. Replace HEPA filters if needed and keep windows closed on high-count days
- Summer — High outdoor humidity can drive indoor levels above 50%. Monitor closely and use dehumidification if needed
- Fall — Heating season begins. Check HVAC filters and watch for dry air as forced-air heating reduces humidity
- Winter — Tightly sealed homes trap pollutants. CO2 and VOC levels tend to peak. Ventilate briefly each day even in cold weather
Maintenance Schedule
| Task | Frequency |
|---|---|
| Check air quality monitor readings | Daily (or review weekly trends) |
| Replace HVAC filter | Every 60-90 days |
| Replace HEPA purifier filter | Per manufacturer schedule (6-12 months) |
| Retest for radon | Every 2-5 years, or after renovations |
| Inspect for mold/moisture | Twice per year (spring and fall) |
| Clean range hood and exhaust fans | Every 3-6 months |
New Construction vs. Older Homes
The air quality challenges you face depend heavily on the age of your home. Understanding the difference helps you prioritize the right tests and solutions.
New Construction (Built Within the Last 5 Years)
New homes are built to modern energy codes, which means they are tightly sealed — great for energy efficiency, but problematic for air quality. Reduced air exchange means pollutants accumulate faster and linger longer.
Primary concerns:
- VOC off-gassing — New paint, flooring, cabinetry, and insulation release formaldehyde, benzene, toluene, and dozens of other compounds. Off-gassing is heaviest in the first 2-8 weeks and can persist at lower levels for months
- Formaldehyde — Composite wood products (particleboard, MDF, engineered wood) in cabinets and shelving are the largest ongoing source
- Tight-building syndrome — Low natural ventilation causes CO2 and VOCs to accumulate, especially overnight in bedrooms
- Construction dust — Fine particulate from drywall, sawing, and sanding can persist in ductwork and settle on surfaces for weeks after move-in
What to prioritize: Aggressive ventilation for the first 2 months, VOC monitoring, and a HEPA purifier with activated carbon. Consider requesting the builder to run the HVAC system with fresh air intake for several weeks before move-in if possible.
Older Homes (Built Before 1980)
Older homes typically have more natural ventilation (less airtight construction), which helps dilute pollutants — but they introduce risks that modern homes do not have.
Primary concerns:
- Radon — Older foundations are more likely to have cracks and gaps that allow radon entry. Test immediately
- Lead paint — Homes built before 1978 may contain lead-based paint. Intact lead paint is not an immediate hazard, but renovation, sanding, or peeling paint releases toxic lead dust. If you plan to renovate, test before disturbing any painted surfaces
- Asbestos — Used in insulation, floor tiles, ceiling textures, and pipe wrapping through the 1980s. Do not disturb suspected materials — hire a certified professional for testing and removal
- Aged HVAC systems — Older ductwork can harbor decades of accumulated dust, mold, and debris. Consider professional duct cleaning if the system has not been maintained
- Hidden mold — Decades of minor leaks can produce mold colonies behind walls, under flooring, or in crawl spaces that are not visible during a walk-through
What to prioritize: Radon testing, mold inspection, HVAC evaluation, and lead/asbestos awareness before any renovation work.
Renter-Specific Tips
If you are renting, you may not be able to install a radon mitigation system, upgrade the HVAC, or make structural modifications. But you can still make a significant impact on your indoor air quality with portable, non-permanent solutions.
What You Can Control
- Portable air purifier — A standalone HEPA purifier requires no installation and moves with you when your lease ends. Place it in the bedroom for the greatest health benefit, since you spend 6-8 hours there daily
- Standalone air quality monitor — Battery-powered monitors like the Airthings View Plus require no wiring or wall mounting. Use data from the monitor to document any air quality issues for your landlord
- Humidity management — Portable humidifiers and dehumidifiers require no installation. Use exhaust fans during showers and cooking, and wipe up condensation on windows promptly
- VOC reduction — Switch to low-VOC or fragrance-free cleaning products, avoid air fresheners and plug-in scent dispensers, and let new furniture off-gas in a ventilated area (balcony, garage) before bringing it indoors
- HVAC filter upgrades — If you have access to the filter slot, upgrading from a basic fiberglass filter to MERV 11-13 is inexpensive and dramatically improves particle filtration. Check your lease or ask your landlord first
What to Ask Your Landlord
- Request HVAC filter replacement records and duct cleaning history
- Ask about previous radon testing — landlords in many states are required to disclose known radon levels
- Report any visible mold, water stains, or persistent musty odors in writing so there is a documented record
- Request that bathroom and kitchen exhaust fans are functional — these are often required by building codes
Document Everything
If your air quality monitor shows consistently poor readings (elevated radon, high PM2.5, humidity above 60%), document the data with screenshots and timestamps. This documentation can be valuable when requesting repairs or improvements from your landlord, and in some jurisdictions, persistent indoor air quality issues may constitute a habitability concern.
The Essential Air Quality Toolkit
Whether you own or rent, these are the core items that give you visibility and control over your indoor environment:
Must-Have
- Air quality monitor — The Airthings View Plus ($329.99) provides the most comprehensive data with radon, PM2.5, CO2, VOCs, humidity, and temperature. This is the single most important investment because you cannot fix what you cannot measure
- HEPA air purifier — The Coway Airmega AP-1512HH ($229) or Levoit Core 400S ($182) removes airborne particles and, with carbon filtration, absorbs VOCs. Run it continuously in the room you occupy most
- Radon test kit — A short-term charcoal canister ($10-30) provides a quick initial screening. Follow up with a long-term test or continuous monitor for confirmation
Recommended
- Hygrometer (if not using a full air quality monitor) — A basic digital hygrometer ($10-15) tracks humidity in rooms where your main monitor is not placed
- Humidifier — The Levoit LV600S ($90) maintains healthy humidity in dry climates or during winter heating season
- MERV 11-13 HVAC filters — Replace basic filters with higher-rated versions for better whole-home particle filtration ($15-25 each)
The Bottom Line
Indoor air quality problems are almost never visible, and a new home — whether newly built or new to you — is the highest-risk period for exposure. New construction off-gasses aggressively, older homes may harbor radon and hidden mold, and every home accumulates pollutants when sealed up during vacancy.
The checklist is straightforward: ventilate on day one, test and monitor during week one, and review your data by the end of month one. An air quality monitor and a HEPA purifier are the two most impactful tools you can own — they transform guesswork into actionable data and measurably reduce your exposure to harmful pollutants.
The effort you invest in the first 30 days pays dividends for as long as you live in the home. Clean air is not something you notice — but the effects of breathing polluted air, day after day, are well documented.
Sources & References
- EPA - Indoor Air Quality — Documents that indoor air pollutant concentrations are typically 2-5 times higher than outdoor levels
- EPA - A Citizen's Guide to Radon — Sets the 4.0 pCi/L action level and recommends testing every home for radon regardless of geography
- EPA - Mold Cleanup Guidelines — Recommends professional remediation for mold growth exceeding 10 square feet
- CDC - Indoor Environmental Quality — Guidance on health effects of indoor air pollutants including VOCs, particulate matter, and biological contaminants
- EPA - Volatile Organic Compounds in Your Home — Identifies common household VOC sources and recommends ventilation as the primary reduction strategy
This guide was researched and written by the AirQualityNest editorial team. We update our content regularly to reflect the latest products, pricing, and research.
Frequently Asked Questions
How long does it take for a new home to off-gas?+
Most new construction materials off-gas most heavily during the first 2-8 weeks after installation. Formaldehyde from composite wood products (particleboard, MDF, engineered hardwood) can continue off-gassing at lower levels for 6-12 months or longer, depending on temperature and humidity. Aggressive ventilation during the first two months — opening windows daily, running exhaust fans, and using an air purifier with activated carbon — significantly accelerates the process and reduces your exposure during the peak period.
Do I need to test for radon if my home is new construction?+
Yes, absolutely. New construction can have radon levels just as high as older homes — radon comes from the soil beneath the foundation, not the building materials. In fact, modern energy-efficient homes with tighter construction may trap radon more effectively than older, leakier buildings. The EPA recommends testing every home regardless of age, construction type, or geographic location. Many new-home builders offer radon-resistant construction features, but these reduce rather than eliminate radon entry, so testing is still necessary.
What is the most important thing to do for air quality in a new home?+
Start monitoring. An air quality monitor reveals problems you cannot see, smell, or feel — including elevated radon, high PM2.5 from construction dust, rising CO2 from poor ventilation, and VOC off-gassing from new materials. Without data, you are guessing. The Airthings View Plus tracks radon, PM2.5, CO2, VOCs, humidity, and temperature continuously, giving you a complete picture of your indoor environment. Pair it with a HEPA air purifier to actively reduce airborne pollutants while you gather baseline data.
Can a renter improve indoor air quality without making modifications?+
Yes. Portable air purifiers, standalone air quality monitors, and humidity management devices all work without any installation or modifications. A HEPA air purifier like the Coway Airmega AP-1512HH plugs into any outlet and immediately reduces PM2.5, dust, pollen, and pet dander. Switching to low-VOC cleaning products and avoiding air fresheners eliminates major chemical sources. You can also upgrade your HVAC filter to MERV 11-13 (usually a simple swap) and use exhaust fans during cooking and showering. These steps alone can dramatically improve your air quality.
How often should I check my home's air quality after the first month?+
With a continuous monitor, you can check daily or review weekly trends through the companion app. Beyond daily awareness, perform a deliberate review each season — spring pollen, summer humidity, fall heating startup, and winter sealed-home conditions all shift your air quality profile. Retest for radon every 2-5 years or after any renovation that disturbs the foundation. Replace HVAC filters every 60-90 days and HEPA purifier filters per the manufacturer's schedule (typically 6-12 months). Annual mold inspections in spring and fall catch moisture issues before they become serious.
Related Reading
How to Test Your Home's Air Quality
Complete guide to testing methods, monitors, and interpreting results
Radon in Your Home
Everything you need to know about radon testing, risks, and mitigation
VOCs in Your Home
Sources, health effects, and how to reduce volatile organic compounds
Formaldehyde in Your Home
The most common VOC in homes — sources, risks, and removal strategies
Best Air Quality Monitors
Our top-rated monitors for continuous home air quality tracking
Continue Reading

Best Air Purifiers for Open Floor Plans in 2026: High-CADR Models That Cover It All
The best air purifiers for open floor plans ranked by CADR, coverage area, and noise. High-performance HEPA purifiers that handle 500-1,500+ sq. ft. open spaces.

Best Smart Humidifiers in 2026 (Wi-Fi, App Control & Auto Humidity)
The best smart humidifiers with Wi-Fi, app control, and auto humidity adjustment. Top picks for Alexa, Google Home, and smart home integration.

The 5 Best Portable Air Quality Monitors in 2026
Monitor your air quality on the go. We tested the best portable and compact air quality monitors for accuracy, battery life, and sensor range.